I have a confession.
I used to think “healthy muffin” meant dry, sad, and kind of tasteless. You know, the kind where you take one bite and immediately wish you’d just eaten a donut.
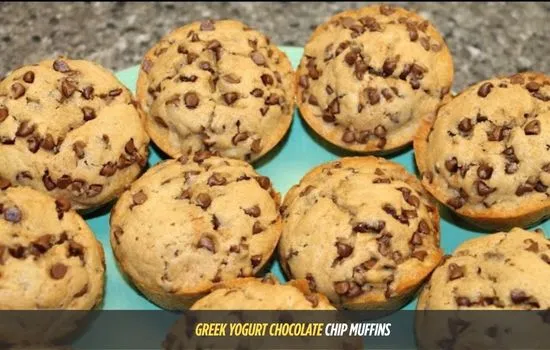
But these easy Greek yogurt chocolate chip muffins?
They changed my mind completely.
The first time I made them, I actually pulled the pan out of the oven, touched the top of a muffin, and legit said “no way” out loud. They were that soft. My kid walked by, stole one, and ran off before I could even get a photo. That’s how I knew the recipe worked.
Let me show you how to make them — no weird ingredients, no oil, and no fuss.
Why This Recipe Works
- Greek yogurt replaces most of the fat — keeps the crumb tender without needing a ton of butter.
- No oil required (but you can add some if you want — I’ll explain below).
- High protein — about 4g per muffin, which is solid for a breakfast or snack.
- One bowl for wet, one for dry — minimal cleanup, I promise.
- Bakes in 15 minutes — because waiting is the hardest part.
(Reader tip: Don’t skip the yogurt. I tried once with sour cream in a pinch, and while it worked, the tang was way stronger. Greek yogurt gives you that creamy moisture without shouting “hey I’m yogurt!”)
- 12-cup muffin tin (or two 6-cup tins)
- Muffin liners or cooking spray
- Large mixing bowl
- Medium mixing bowl
- Whisk
- Spatula or large spoon
- Measuring cups and spoons
- Microwave-safe bowl (for butter)
- Toothpick (for testing doneness)
Nothing fancy here. If you’ve got a working oven and a bowl, you’re basically ready.
Ingredients
Here’s what you’ll need to grab. Most of this is pantry stuff — eggs, flour, sugar, vanilla. The only “special” thing is plain Greek yogurt.
- 2 cups all-purpose flour
- ¾ cup granulated sugar
- 1 tsp baking soda
- ½ tsp salt
- ½ cup butter (or ¼ cup butter + ¼ cup olive/avocado oil — see note)
- 1 cup plain Greek yogurt (full-fat or 2% works best)
- ½ cup milk (2% or whole — please don’t use skim)
- 1 large egg
- 1 tsp vanilla extract
- ¾ cup chocolate chips (semi-sweet or milk — your call)
Note on butter vs. oil:
Using all butter gives you that rich, almost buttery-bakery taste. But half butter + half oil makes the muffins slightly softer and keeps them moister a day longer. I’ve done both. Both are good. You can’t really mess this up.
Wait, scratch that — I did mess it up once when I used fat-free Greek yogurt and skim milk together. The muffins came out a little tough. Lesson learned: don’t go full fat-free. Your muffins need some fat to stay fluffy.
How to Make Easy Greek Yogurt Chocolate Chip Muffins (Step by Step)
1. Preheat and prep your pan
Set your oven to 375°F (190°C).
Line your muffin tin with paper liners or give it a quick spray with cooking oil. I prefer liners because they make cleanup laughably easy, but spray works fine too.
2. Mix the dry ingredients
In a large bowl, add:
- 2 cups flour
- ¾ cup sugar
- 1 tsp baking soda
- ½ tsp salt
Whisk everything together until it looks uniform. Set this bowl aside for a minute.
3. Melt the butter (gently)
In a medium microwave-safe bowl, add ½ cup butter.
Microwave for 20 seconds. Stir it. Then microwave another 15–20 seconds.
You want the butter mostly melted — a few small soft chunks are fine. Don’t blast it until it’s boiling. Burnt butter smells sad.
4. Add the wet ingredients to the butter
To that same bowl with the warm butter, add:
- 1 cup Greek yogurt
- ½ cup milk
- 1 egg
- 1 tsp vanilla
Whisk until everything is combined and smooth. It’ll look kind of pale yellow and smell like vanilla and melted butter. That’s the good stuff.
5. Mix wet and dry, but don’t overdo it.
Pour the wet mixture into the large bowl of dry ingredients.
Use a spatula or spoon to stir just until the flour disappears. A few small lumps are totally fine.
*This is where I ruined my first batch. I stirred and stirred because I wanted it perfectly smooth. Don’t do that. Overmixing = tough, dense muffins. Stir maybe 10–12 times and stop. *
6. Add the chocolate chips
Toss in ¾ cup chocolate chips and gently fold them in. You’ll see little streaks of chocolate starting to melt from the warm butter — that’s a good sign.
7. Fill the muffin cups
Scoop the batter into each liner. Fill them almost full — about ¾ to almost to the top.
If you want that bakery-style look, sprinkle a few extra chocolate chips on top of each muffin before baking.
8. Bake
Pop the pan into your preheated oven. Bake for 15–17 minutes.
At 15 minutes, do the toothpick test: stick a toothpick into the center of a muffin. If it comes out clean or with a few moist crumbs (not wet batter), they’re done.
Mine are usually perfect right at 15 minutes, but ovens vary. My old oven took 17 minutes. Just keep an eye on them.
You’ll know they’re close when the kitchen starts smelling like a bakery — warm butter, vanilla, and chocolate all mixed together.
9. Cool (don’t skip this)
Let the muffins cool in the pan for 5–10 minutes. Then transfer them to a wire rack.
If you try to pull them out immediately, they might fall apart. Patience, friend.
Storage & Freezing
Room temperature:
Store in an airtight container for 3–4 days. After day 2, they’re still good but slightly less fluffy.
Refrigerator:
They’ll last another 2–3 days in the fridge. When you want one, microwave for 10–15 seconds. It brings back that just-baked softness.
Freezer:
Wrap each muffin tightly in plastic wrap or foil, then put them in a freezer bag. They’ll stay good for up to 3 months.
To thaw: leave on the counter for an hour or microwave in 15-second bursts.