Taro root is a very healthy tuber that’s been succeeding in tropical areas for centuries – in Asia, Africa, the Caribbean, and the Pacific Islands, to name a few. People have been growing it for generations now, and for good reason. When cooked, taro root has a beautiful, mild sweetness and a creamy texture that makes it stand out. Plus, it’s a fundamental ingredient in many classic and modern recipes.
We’ll take a closer look at taro root. We’ll cover the different types available, their impressive nutritional benefits, and share some top cooking tips. Here we show the best ways to store and freeze it, and how to keep it fresh and delicious.
Contents
- 1 What Is Taro Root?
- 2 Types of Taro Root
- 3 The Key Nutrients in Taro Root (Per 100g Cooked)
- 4 Storing Fresh Taro Root – Keeping it Fresh for Longer
- 4.1 Storing a Whole Raw Taro Root
- 4.2 Storing Taro Root in the Fridge
- 4.3 Storing Cooked Taro Root
- 4.4 How to Freeze Taro Root – Preserving it for Months
- 4.5 The Best Way to Freeze Taro Root
- 4.6 Freezing Cooked Taro Root
- 4.7 Signs Your Taro Root Has Gone Bad
- 4.8 Taro Root vs Other Root Vegetables – What’s the Difference?
- 4.9 The Health Benefits of Taro Root
What Is Taro Root?
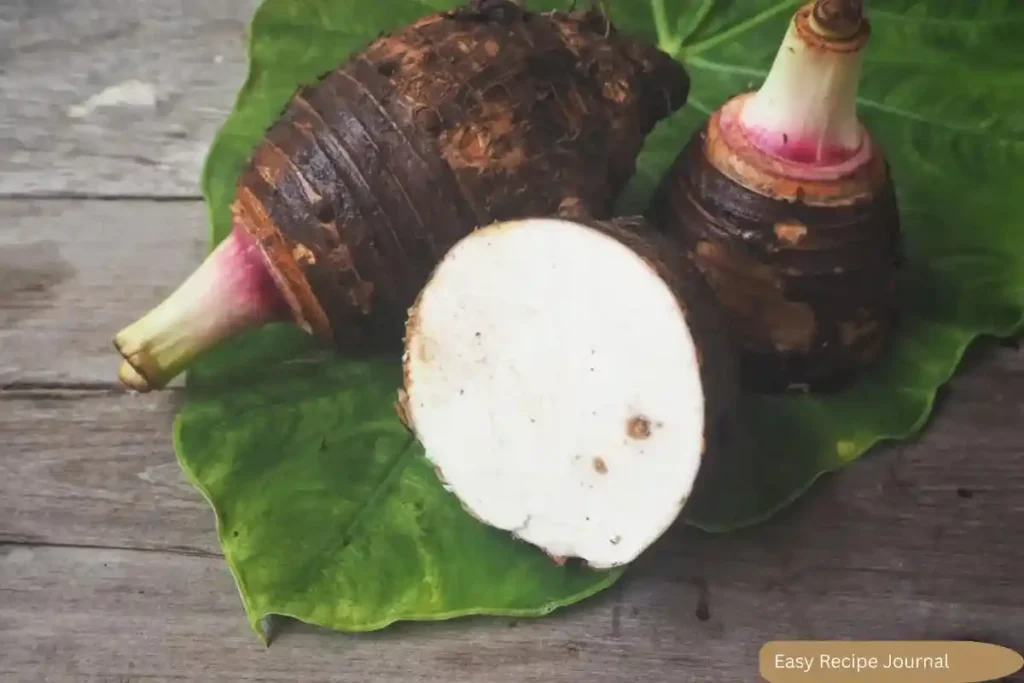
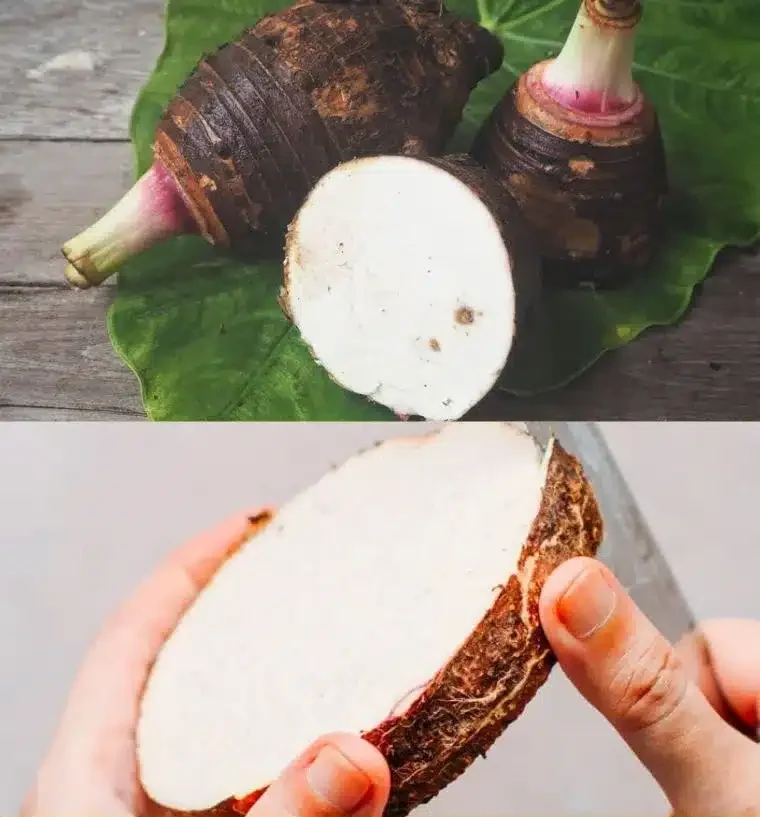
Taro root is actually the underground corm of a plant called Colocasia esculenta. On the outside, it has a hard, rough brown skin that makes it look a bit rough, but inside, it’s white, cream, or light purple with striking violet lines.
When you pick it up raw, it’s nice and firm, and pretty starchy, but as soon as you start cooking it, it becomes soft and silky – it develops a lovely, little nutty taste that’s really hard to beat. The texture is often compared to potatoes, but trust me, it’s much denser and a lot creamier.
You’ll find taro root turning up in all sorts of dishes – soups, stews, curries, and even fries (who knew?!) as well as some amazing desserts and drinks.
Types of Taro Root
You’ll find there’s a broad range of taro root types out there, all grown in different parts of the world. The most common ones are:
1. Dasheen Taro
These are the large, round, starchy ones you’ll often find in Caribbean and West African cooking.
2. Eddoe Taro
These are the smaller, oval-shaped guys that are a hit in Asian cooking
3. Japanese Satoimo
These are the tiny, smooth-skinned ones that are used in Japanese dishes
Each one’s going to be slightly different in texture and taste, but the one thing they all have in common is that they’ve got to be cooked thoroughly before you eat them.
Nutritional Value of Taro Root
Taro root is a serious superfood – it’s full of nutrients and offers a bunch of amazing health benefits.
The Key Nutrients in Taro Root (Per 100g Cooked)
- Calories: ~112 kcal
- Carbohydrates: 26 g
- Fibre: 4 g
- Protein: 1.5 g
- Fat: 0.2 g
- Vitamin E
- Vitamin C
- Potassium
- Magnesium
- Resistant starch
Taro root is a top source of dietary fibre, which is brilliant for your digestive health. And the resistant starch content? It may help with blood sugar levels. Plus, the potassium content helps keep your heart healthy and your electrolytes balanced.
How to Prepare Taro Root Safely
Raw taro root contains calcium oxalate crystals. If you eat it raw, it can irritate your skin and throat.
Safe Preparation Steps
- Wear gloves to avoid getting taro sap on your skin
- Rinse it under running water to get rid of any dirt
- Use a vegetable peeler or a knife to peel the thick outer skin
- Chop it up into whatever shapes you need
- And then, of course, cook it right through before you eat it
Don’t even think about eating raw taro root.
How to Cook Taro Root
Cooking taro root is versatile; it depends on the recipe you use. Below are the top methods for cooking it.
Boiling Taro Root
Boiling’s the simplest and most common method
Here’s What You Do
- Peel and chop the taro root into chunks.
- Place it in a pot, cover with water, and add a pinch of salt.
- Bring it to the boil, then simmer for 15-25 minutes, until a fork slides in smoothly.
- Drain off the water, and you’re good to go – you can use it in soups, mash it like potatoes, or add it to stews for thickening.
Boiled taro root makes for a great mash, or you can add it to stews for an extra bit of thickening.
Steaming Taro Root
Steaming helps retain all the nutrients and flavour.
- Chop up peeled taro into bite-sized cubes.
- Pop that into a steamer for 20-30 minutes, or until it’s soft.
- Now you can add some seasoning or use it in your favourite recipe.
Steamed taro is a real game-changer for dumplings and desserts.
Frying Taro Root for a Great Crunch
If you want a crispy texture:
- Slice that taro into thin rounds.
- Remove as much moisture as possible; pat it dry with a paper towel.
- Fry it in hot oil until golden brown, but not too hard.
- Drain off the excess oil and add a bit more seasoning.
People love munching on taro chips in loads of regions around the world.
Baking or Roasting Taro Root – Easy Peasy
- Get your oven up to 400°F (200°C).
- Toss some peeled cubes with a bit of oil and your choice of seasoning.
- Throw it in the oven for 30-40 minutes, roasting until tender.
Roasting taro really brings out a lovely caramelised, nutty flavour.
Delicious Taro Root Recipes to Try
Taro root is highly versatile and is found in cuisines around the globe.
- Taro root curry
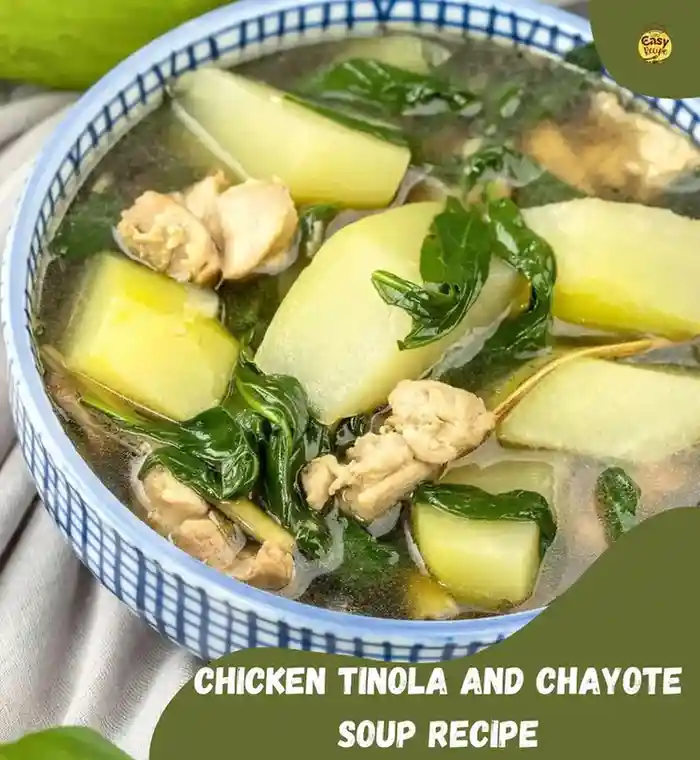
- Taro root soup
- Mashed taro (a tasty twist on mashed potato!)
- Taro chips
- Taro bubble tea
- Taro dessert paste (so tasty!)
Its ability to absorb all the flavours makes it perfect for both sweet and savoury dishes.
Storing Fresh Taro Root – Keeping it Fresh for Longer
Properly storing it will keep it at its best for longer and prevent spoilage.
Storing a Whole Raw Taro Root
- Just pop it in a cool, dry place with good airflow.
- If you don’t need it for a while, don’t refrigerate it.
- You’ve got up to 5-7 days before it’s gone off.
Storing Taro Root in the Fridge
If you need to keep it for a bit longer:
- Chuck it in a perforated bag in the veggie crisper.
- Use it up in a week or two.
Make sure to avoid trapping moisture in there, as it will cause mould.
Storing Cooked Taro Root
- Once it’s cooled, chuck it into an airtight container.
- Stick it in the fridge for up to 4 days.
When you’re ready to eat it, reheat it thoroughly.
How to Freeze Taro Root – Preserving it for Months
Freezing taro root is an effective way to preserve it for extended periods.
Can You Freeze Raw Taro Root?
Freezing raw taro isn’t recommended – it gets all soggy and loses its texture.
The Best Way to Freeze Taro Root
- Peel and chop the taro into cubes.
- Give it a quick blanch in boiling water for 3-5 minutes.
- Dunk it in ice water to cool.
- Pat it dry with a paper towel to remove any excess moisture.
- Pop it on a baking tray and chuck it in the freezer until it’s hard, then transfer it to a freezer-safe bag.
Frozen taro lasts up to 10-12 months.
Freezing Cooked Taro Root
Cooked taro freezes beautifully.
- Let it cool down completely.
- Portion it out into airtight containers.
- Chuck it in the freezer for up to 6 months.
Thaw it in the fridge first, then reheat when you’re ready to eat it.
Signs Your Taro Root Has Gone Bad
Get rid of it straight away if you notice any of these:
- It’s gone all soft and mushy
- There’s some mould growing on it
- It smells really off
- The inside of it’s gone dark and slimy
Fresh taro should feel firm and dry.
Taro Root vs Other Root Vegetables – What’s the Difference?
| Feature | Taro Root | Potato | Cassava |
| Texture (Cooked) | Creamy | Fluffy | Dense |
| Flavor | Mild, Nutty | Neutral | Slightly Sweet |
| Fiber | High | Moderate | Moderate |
| Must Cook Before Eating | Yes | Recommended | Yes |
Taro root really has more fibre and a unique flavour than many other common tubers.
The Health Benefits of Taro Root
- Helps your digestive system
- Delivers a continuous supply of energy
- Rich in antioxidants to help you look and feel good
- Might even support your heart health
- And it’s naturally gluten-free, so great for people with gluten issues
It contains a type of starch that supports gut health.
How to Cook and Store Taro Root Easily?
Discover how to cook taro with this easy step-by-step guide! This unique root vegetable is ideal for adding to soups, hearty stews, rich curries, and more.
Ingredients
Instructions
Peel the Taro
- Using a vegetable peeler or knife, remove the thick brown skin completely. Rinse under cold water.
Cut into Pieces
- Slice into even 1-inch cubes to ensure even cooking.
Boil
- Place the taro pieces in a pot and cover with water. Add salt.
- Bring to a boil, then reduce heat and simmer for 15–20 minutes, or until fork-tender.
Drain and Serve
- Drain well. Drizzle with olive oil and season with black pepper. Serve warm.
Nutrition Facts
Servings 4
- Amount Per Serving
- Calories 120kcal
- % Daily Value *
- Total Fat 0.5g1%
- Total Carbohydrate 26g9%
- Dietary Fiber 4g16%
- Protein 2g4%
* Percent Daily Values are based on a 2,000 calorie diet. Your daily value may be higher or lower depending on your calorie needs.
Note
Always cook taro thoroughly before eating.
If you have sensitive skin, wear gloves while peeling.
For extra flavor, boil in vegetable broth instead of water.
Pin this recipe to share with your friends and followers.

Frequently Asked Questions
Is taro root good for me?
Indeed - it's packed with fibre, potassium and antioxidants.
Can I eat taro root raw?
No, you have to cook it to get rid of those pesky calcium oxalate crystals.
What does taro root taste like?
It's got a mild sweetness, with a lovely nutty flavour when it's cooked - and it's really creamy to eat, too.
How long does taro root last?
Raw taro lasts about a week at room temperature and up to two weeks refrigerated. Frozen taro lasts up to one year.
Is taro root gluten-free?
Yes. Taro root is naturally gluten-free and suitable for gluten-sensitive diets.

You may also like...